
Led House number install
Delivery drivers always have trouble finding our house as it is set far back from the street so I created this backlit house number post. My requirements were:
- Powered by 12VAC landscape lighting
- Easily visible from the street
- Distinctive look to catch the eye of guests
Building Materials:
- Cedar Fence posts x 4
- 1in x 1in framing boards x 4
- 1.5 in outdoor fence screws
- Metal Fence post
- Low voltage landscape wire
- Spray paint
- Painters tape and masking
Tools:
- Drill
- Wire strippers
- Tape Measure
- Ruler
- Level
- Sharpie
Caveat:
Low voltage landscape wiring is 12VAC and the LEDs in the house numbers should be driven by 12VDC. Because of this I built a rectifier bridge circuit to convert from 12VAC to 12VDC. This was not difficult and I found many other instructables on how to do this like this one.
Step 1: Measure and Drill

The first step is to measure and drill holes to mount the numbers. I chose to make my post 48" tall and since each number is 8" tall I put a 1" margin above and below each. After drawing a line every 10" I used a ruler to draw a line down the center of the board. I then measured and drilled holes for the mounting screws along the center line. Next I drilled larger holes for the wires under where the wires came out of each number. After doing this I cut each of my 4 fence posts to 4ft to prepare them for assembly. Be careful in this step to measure many times and cut and drill once. This is where you get everything lined up and will make a large difference in how it looks in the end.
Step 2: Build the Post


To build the post I used outdoor screws. Be careful though to pre-drill holes or you will end up splitting the boards as you can see I did with my first cap. I cut a second as I had extra material.
Step 3: Paint the Post


To paint the post I drove a piece of rebar into the ground to hold it up on top of a cardboard box and painted with spray paint. I used one can of primer and three cans of color. After it was painted I let it sit overnight to cure. In the morning I took the back panel off to prepare it for the next step.
Step 4: Install the Fence Post

When installing the fence post be careful to install it straight up and down. Also, be careful of any existing buried electrical wires (like your low voltage landscape lighting). Once you install it you can zip tie on the last of the 1x1 boards and screw that into the fence posts. Now you are ready to start installing your numbers and wiring it up.
Step 5: Install Numbers


To install the numbers I went to the hardware store and got some machine screws and washers to use instead of the included hardware. The included hardware was designed for installing in house siding that you wouldn't have access to the back of.
Step 6: Install Bridge Rectifier Circuit


For the bridge rectifier circuit you can build your own as I have done. It is simply 4 diodes and then a capacitor to smooth out the output. Also I installed a test LED with current limiting resistor and 1M Ohm resistor across the output to make sure I didn't blow it up accidentally by connecting it to AC without a load. I used wire nuts with grease in them for all the connections in the box. For extra waterproofing I coated all the electronics in hot glue.
If this step is too advanced you could purchase a rectifier like this one to do the same thing
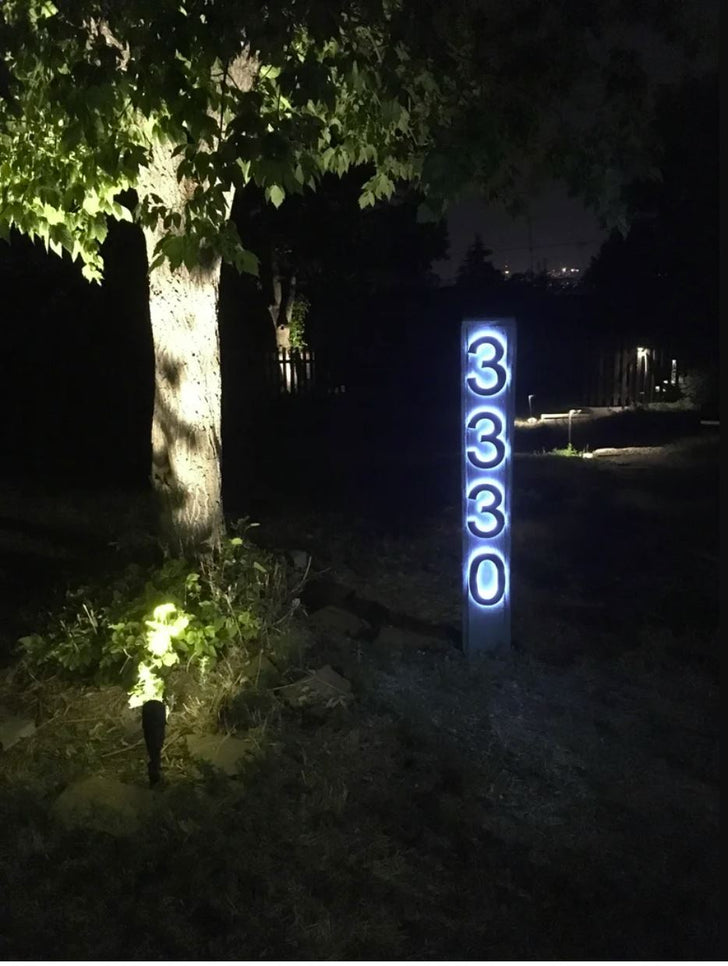
Step 7: Caulk, Finish Painting and Enjoy!

To finish it off I caulked all the cracks to keep water out, covered up the numbers and painted the caulk after it dried. I'm very proud of the result, it will make it very easy for delivery drivers and guests to find our house.
